
Showing posts with label baking. Show all posts
Showing posts with label baking. Show all posts
6/8/10
First Try at Homemade Sausage
Homemade Sausage
1 pound ground beef
1/4 c chopped onions
1/4 t. cumin
1/4 t. marjoram
1/4 t. ground pepper
1/4 t. oregano
1/4 t. ground nutmeg
1/4 t. cayenne pepper (heaping...probably closer to 1/2 tsp.)
1/4 t. ground ginger
1/2 t. dried basil
1/2 t. thyme
1/2 t. sage
2 t. sea salt
1 egg
Mix all the ingredients together, and fry it up!
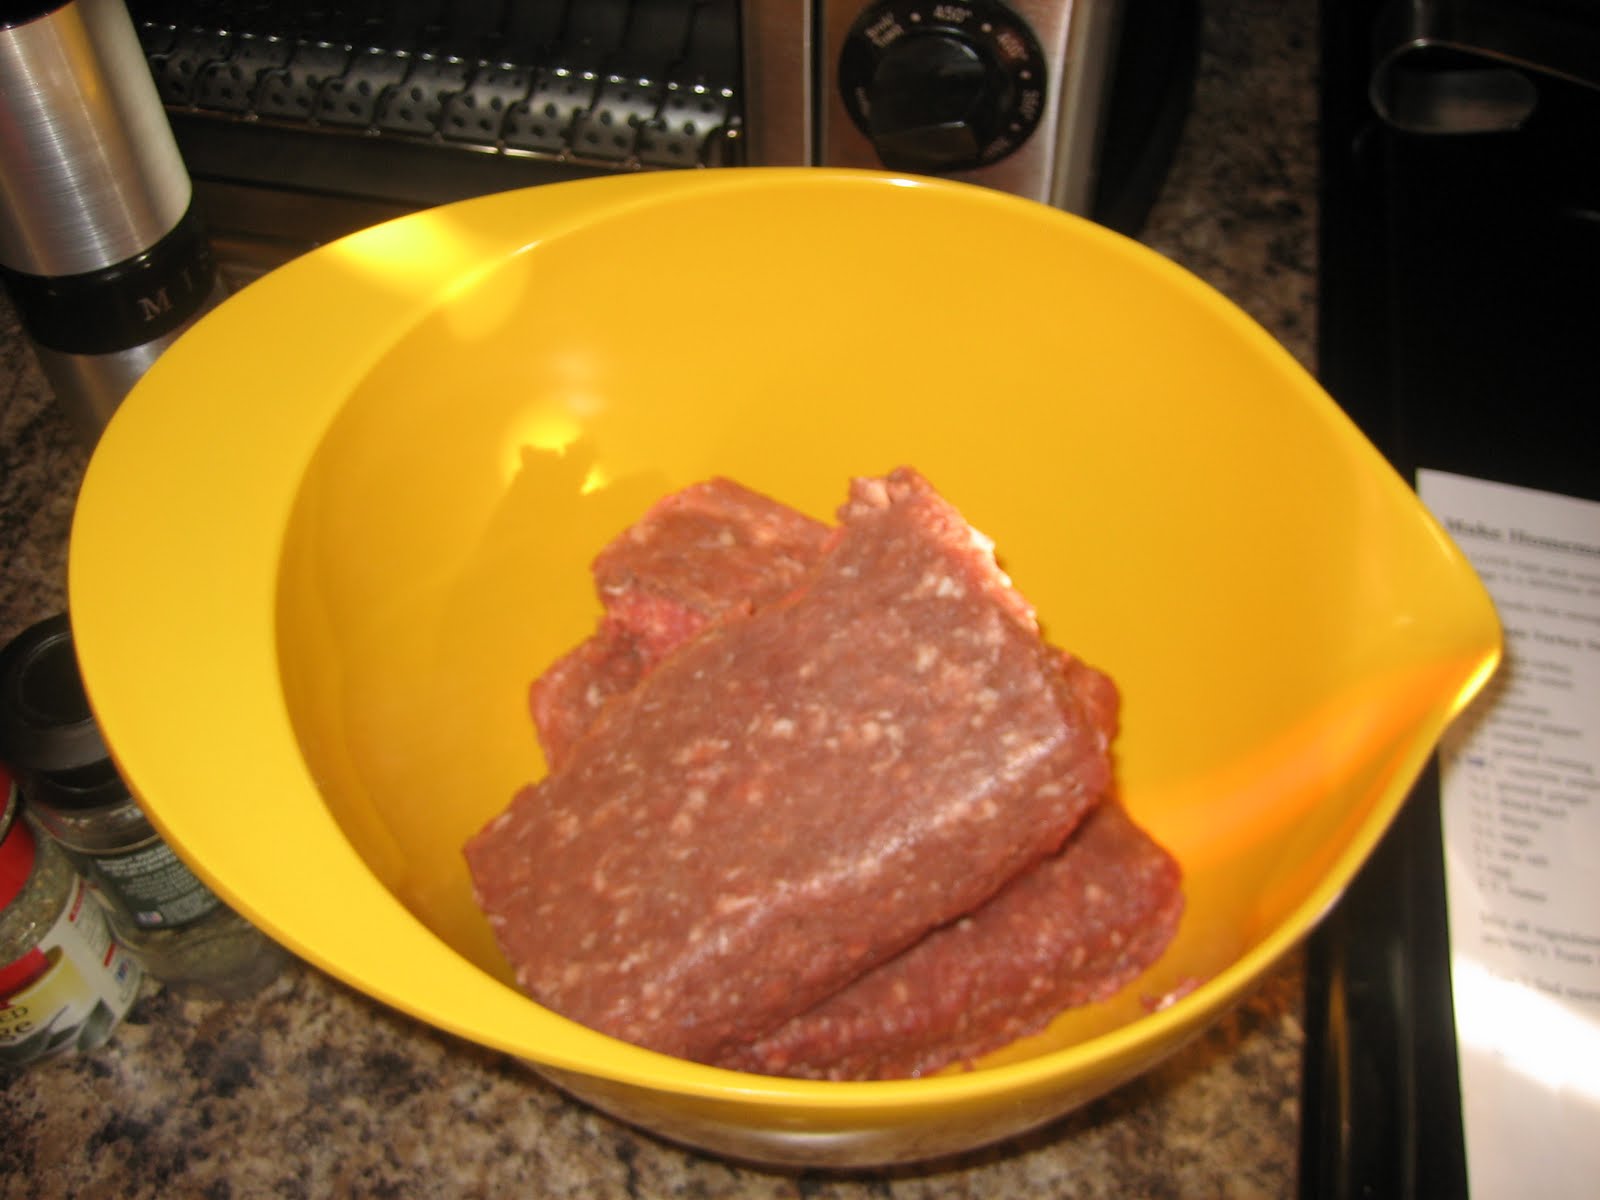
I doubled the recipe, so I was using two pounds of ground beef. I found it in the markdown bin of the meat section of my grocery store, so I ended up getting a great deal for it, and was planning on doing freezer cooking this weekend anyway, so I figured I would double it and freeze it for later!

Once all the spices were added, I mixed it up to combine thoroughly. I tried mixing with a spoon, but I'd recommend just throwing your hands in there and mashing it around like Play-Doh. It works much better!

I fried my sausages in olive oil and used my cast iron skillet. It worked pretty well, and I was happy to get some use out of my skillet, which I hardly ever pull out.

After cooking, I put them on a plate lined with a paper towel to absorb some of the extra oil. Even though I used organic olive oil, which is a relatively healthy oil, I don't particularly like greasy food, so I figured I'd get some of the grease off before I froze them.
I would say all in all my doubled recipe made close to 30 or so patties, which should last us quite a bit of time. I took a bite out of one of them, and I'm happy to say that they are very good! They have lots of flavor (once I remembered to add the salt...the first pan-full that I fried up I had forgotten to add salt...) and they were quite spicy. I would recommend cutting back on the cayenne pepper if your family isn't really into spiciness, otherwise, they are great as is!
Have you tried any new recipes lately? I would love to hear about them! Link up to this post in the comments section if you have a blog and want to share your recipes!
This post is part of:
Tempt My Tummy Tuesday
Balancing Beauty and Bedlam
Slightly Indulgent Tuesday
Real Food Wednesday
5/26/10
Whole Wheat Bread Dough...or Pizza Crust!
I recently tried out this recipe I found on Kitchen Stewardship for artisan bread. It fits all my criteria I am working to meet for recipes I am trying out - uses mostly whole wheat flour, not too much sweetener, and can be used in a variety of different ways.
Here is the original recipe:
1 1/2 c hot water
1 1/2 c cold milk
1 1/2 T yeast (about two packets)
1T + 1 tsp salt
1/2 c honey
5T neutral flavored oil
6 2/3 c whole wheat flour
1) Mix the water, milk, yeast and salt until they are combined and not lumpy.

2) Add in the remaining ingredients until they are uniform, being careful not to overwork it.
3) Cover and let rise for 2-3 hours.

5) Let it rest and rise 1 1/2 hours,
6) Preheat oven to 350 degrees. Place metal pan in the bottom of the oven with 1-2 cups of water to allow moisture for the bread. Bake bread for 40-50 minutes.
So that's what the original recipe said, but of course you know I took that and went my own direction. I used less than 1/2 c of honey - not because I am opposed to honey, but I ran out midway so I ended up using a little more than 1/4c. I also used a mixture of whole wheat and white flour for a slightly lighter texture and density. Lastly, I have not actually made bread with this recipe, but rather pizza crust (and boooy it is delicious!) My dough didn't exactly rise the way I expected it to, so rather than making flat bread, I figured I would utilize it in a way that we love around here - pizza!
I made three decent shaped balls of dough, and wrapped them in plastic wrap before putting them in a freezer bag to store in the freezer. This way, when I'm ready to make pizza, I can take one ball out at a time and not have to worry about thawing out a huge ball of dough when I only need half of it for a crust.

Patience is not really a virtue I possess, so I was eager to try out my pizza dough. I decided to make personal pan sized pizzas, since it was just me eating it for lunch. I actually thawed the dough in the microwave, which probably isn't ideal, but worked just fine for my pizza! I rolled it out, and placed it on a GREASED cookie sheet (very important, otherwise it will stick like crazy!)

I baked it at 350 for about 8 minutes, just long enough to get it a little bit firm.

I took it out, put some spaghetti sauce and cheese on it, and voila! I baked it for about 5 more minutes at 350, and then turned it to broil and broiled it for a few minutes to get the cheese nice and bubbly. It may not be the prettiest pizza in the world, but it is fantastic! A great treat for me for lunch, and I'm definitely going to try it out on the hubby too!
5/11/10
Homemade Angel Food Cake
Last night I decided to make an angel food cake as a "treat" for me and my husband. Turns out my husband doesn't like angel food cake, so that kind of backfired (and left me with a lot of cake to eat on my own), but it was a great excuse to get some organic strawberries and whip cream, and have a lovely dessert!
I found the recipe online at cookinglight.com. I'm not sure if it was because it was a light recipe (although 1 1/2 cups of sugar is still a lot), but the cake does have a bit of an "eggy" taste to it. It doesn't bother me, since I smother mine in strawberries and whipped cream (see last photo), but it might bother some so I wanted to lay out that warning.
I found the recipe online at cookinglight.com. I'm not sure if it was because it was a light recipe (although 1 1/2 cups of sugar is still a lot), but the cake does have a bit of an "eggy" taste to it. It doesn't bother me, since I smother mine in strawberries and whipped cream (see last photo), but it might bother some so I wanted to lay out that warning.
Here is the recipe if you are interested in making it:
Ingredients:
1 cup sifted cake flour
1 1/2 cups sugar, divided
12 large egg whites
1 tsp cream of tartar
1/4 tsp salt
1 1/2 tsp vanilla extract
1 1/2 tsp fresh lemon juice
1/2 tsp almond extract
Preparation:
Preheat oven to 325.
To prepare cake, lightly spoon flour into a dry measuring cup; level with a knife. Combine flour and 3/4 cup sugar, stirring with a whisk.

Place egg whites in a large bowl; beat with a mixer at high speed until foamy. Add cream of tartar and salt; beat until soft peaks form. Add 3/4 cup sugar, 2 tablespoons at a time, beating until stiff peaks form. Beat in vanilla, juice, and almond extract.

Sift 1/4 cup flour mixture over egg white mixture; fold in. Repeat with remaining flour mixture, 1/4 cup at a time.

The lighting is not too good in this picture...the whites were not really brown, they are just shadowed.
Spoon the batter into an ungreased 10 inch tube pan, spreading evenly. Break air pockets by cutting through the batter with a knife. Bake at 325 for 55 minutes or until cake springs back when lightly touched. Invert pan; cool completely. Loosen cake from sides of pan using a narrow metal spatula. Invert the cake onto a plate.

As you can see, I did not have a tube pan. I wouldn't really recommend this, as the cake stuck to the pan like crazy, but it worked if you are in a pinch and aren't planning on showing off the cake to any guests or anyone.

See before comment. I suppose I might as well have just skipped the cake and eaten whipped cream with strawberries by itself, but the cake really is in there buried under all the cream!
5/3/10
Banana Muffins
This weekend was kind of a festival of cooking, so here is another one to add to the mix! I stumbled upon this recipe from Hoosier Housewife for homemade banana bread, and happened to have some extremely ripe and brown bananas lying around waiting to be thrown away, so I decided to use them right up!
Here is the recipe as she posted it, with my notes to the side:
Ingredients:
- 2 c. less 2 T. Flour (I used 1 c. whole wheat, 1 c. minus 2 T white)
- 1 c. Sugar
- 1 t. Baking Soda
- 1/2 t. Salt
- 1/2 c. Oil
- 2 Eggs
- 3 Very Ripe Bananas
- 1 t. Vanilla
- 1/2 c. Nuts (optional) ( I opted out)
Directions:
Sift and mix together dry ingredients. Add oil and eggs, one at a time. Beat after each addition. Add mashed bananas (I put my bananas in the food processor) and vanilla. Fold in nuts , if desired. Pour into pans, bake at 350 degrees, 1 hour for large loaf and about 40 minutes for mini loaves.

I'm less of a fan of the banana bread though, since we have a tendency to not eat it all very quickly, and I am always looking for easy things for my husband to take to work with him, or for us to eat on the go. Thus, I made banana muffins!

I still baked them at 350 degrees, but I baked them for about 14 minutes, or until they were golden brown on top.

They are delicious! They are so light and fluffy, and have a great but not too sweet banana flavor!
Did you do any baking or cooking over the weekend? I would love to hear about it!
5/2/10
Breakfast Burritos - Make Ahead and Freeze!
One of my family's favorite breakfast dishes are breakfast burritos, and I recently decided to make them in large batches and freeze them so my husband can take them to work with him (you may have heard me talk about these breakfast burritos in previous posts). He's been asking for me to add potatoes to them, since before they were just eggs and sausage, so I searched around until I found some ideas. I found Heavenly Homemaker's Hashbrown recipe and added those to the burritos for a little potato goodness!
First I started with some washed and poked potatoes (remember to poke them so the steam can escape).

I placed them in a baking dish, and baked them for around 1:45 in the oven at 350 degrees.

Then I peeled the skin off, so they were naked potatoes!

I shredded them with my new shredder (got it at Marshall's for $5!)

And fried them up in the skillet with some butter. Heavenly Homemaker suggested using an electric skillet, but I don't have one, so I just used my non stick. Be sure it's not too hot, as the butter will start to smoke, and the potatoes won't brown as nicely.

Ta-da! Hash browns to add to my breakfast burritos!
Now, to assemble the burritos. Here's what I use:
- 12 eggs, scrambled
- 1 pound reduced fat pork sausage
- 1 small can green chilis
- 3 potatoes, cooked into hash browns as above
- 4 oz shredded colby jack cheese
- 12 or so tortillas, depending on how full you make them
Brown the sausage in a large saucepan. Mix together eggs and green chilis, and add to sausage pan when sausage is fully cooked. Let the eggs cook completely, then remove from heat. Assemble burritos, wrap in foil, and freeze!

As you can see, I somewhat misjudged how many eggs I was using, and my saucepan is very full.
Once I got my eggs all cooked, I assembled my burritos. I used potatoes, eggs, sausage, green chilis, and cheese, but you could also add in anything that suits your fancy!

Once I got them all made up I wrapped them first in a paper towel and then in tin foil. That way, I can freeze them, and when my husband wants to eat one he can remove the tin foil and heat the burrito in the paper towel in the microwave. He usually eats them at work, so this saves him the step of having to find something to heat it up in.
In total I made about 17 or 18 burritos, which will last us about three weeks! It is a balanced, semi-nutritious meal for him to take to work, so we save the money that he would be spending on fast food and its better for us!

4/30/10
Hummus Among Us
Hummus
3 tablespoons tahini (sesame-seed paste)
1 1/2 teaspoons ground cumin
1 teaspoon ground coriander (I used whole coriander, because I didn't have ground)
3/4 teaspoon salt
1/8 teaspoon ground red pepper (I used red pepper flakes)
2 garlic cloves, chopped
1 (15 oz) can chickpeas (garbanzo beans), rinsed and drained

I used the reduced sodium chickpeas, and goya chopped garlic from the jar. Basically you just get all the ingredients together, and add them to the food processor. I accidentally used a 16oz can of garbanzo beans instead of a 15oz can without realizing it, so my hummus was very thick at the beginning.


That's what the end result looked like, and let me tell you, it is gooood. It has a great taste and just the right amount of spices. I can't wait to try it on some homemade bread or fresh veggies. And, as if I needed more reason to like it, it only has about 650 calories for the whole batch. I don't plan on sitting down and eating the whole batch at once, so I figure it will be a great snack if I eat a few tablespoons at a time.
Have you tried any new recipes lately that you want to share? I would love to hear all about them!
Freezer Recipes - Make Ahead Butterhorns
So in thinking towards meals that I would really like to serve with bread, but not wanting to make a whole batch of bread for one dinner, I decided to make MoneySavingMom's Make Ahead Butterhorns . She does a great job on the site of explaining all the steps with pictures, so I'm not going to be too detailed with mine. However, I will show you the changes that I made to the recipe (you knew to expect that, right?!)
First off, I halved the recipe, so while the original recipe says this:
Make-Ahead Butterhorns (makes 32 rolls)
2 Tablespoons dry yeast, heaping
1/3 cup warm water (110-115 degrees)
9 cups flour, divided (you can use any mixture of white or whole-wheat flour you’d like)
2 cups warm milk (110-115 degrees)
1 cup butter, melted
1 cup sugar (we substituted sucanat)
6 eggs
2 teaspoons salt
3-4 Tablespoons butter, melted
Mine was more like:
Make-Ahead Butterhorns (makes 20 rolls)
1 Tablespoons dry yeast, heaping
approximately 1/6 cup warm water (I just used my 1/3 cup, and put about 1/2 of it)
5 cups flour, divided (I used 3 cups white, 2 cups whole wheat)
1 cups warm almond milk (heated in the microwave for about 1 1/2 min)
1/2 cup butter, melted
1/2 cup sugar
3 eggs
1 teaspoon salt
Although the original recipe says that it will make 32 rolls, my halved recipe made 20. Maybe mine were somewhat smaller, I'm not sure. I also didn't brush mine with butter at the end, because I figure that is an added 300-400 calories of butter on top of the rolls, and it doesn't add all that much flavor. I may do an egg wash before baking them for color.
I mixed it all up and rolled them up, placed them on a pan and stuck them in my chest freezer for about 45 minutes. Once they were frozen, I put them in a baggie to freeze until I need them! Here is a picture of the finished product, although these were already frozen when I took the picture, so they were puffier before freezing.

I think they will be a great addition to any dinner, and I plan on having them tonight when I bake my hubby a special meal to start the weekend off right!
4/14/10
Homemade Granola Bars
Here is the recipe that I started with, kindly borrowed from the blog Kitchen Stewardship.
Ingredients:
4 1/2 cups rolled oats
1 cup whole wheat flour, or spelt
1 tsp baking soda
1 tsp vanilla
1 cup butter, softened*
1 cup honey
Add-ins: 1 cup mini semi-sweet chocolate chips, 1 cup chopped walnuts
other options include dried fruits, sunflower seeds, coconut, nuts…
*If you have hard butter, you can roll it under wax paper with a rolling pin.
As I have mentioned before, I am not great at sticking to the recipe. I tend to try and make things a little healthier or less caloric. Naturally, this was no exception. I substituted one of the sticks of butter (1/2 cup) for 1/2 cup applesauce. I also didn't use quite a whole cup of whole wheat flour.

Here's what it looked like in my mixing bowl. At this point, if you are a person that is fond of eating dough (not sayin' I am....but I TOTALLY AM!) I would definitely recommend taking a bite or ten of this granola. As much as I think the granola bars were successful, they are nothing compared to how wonderful this tasted when it was all mixed up. I think the baking part kind of dulls the honey taste, but when it is just the batter - yuuuuuuuuum.
Moving on...once the batter is all mixed up, put it in a 9x13 pan. The original recipe says to butter the pan. I didn't find that necessary, and mine didn't stick.

Bake them for 15-20 at 325, and voila!

I didn't add anything to mine, but I would recommend it. My husband said they taste like oatmeal without any add ins. I tried them last night with a bit of granola bar, a chocolate chip, and a dried cherry all at one time (a party in my mouth, if you will), and they were divine, so next time I am going to try to just mix stuff in to make their deliciousness even better. All that being said, they do taste much more oatmeal-y than normal granola bars. I eat oatmeal every morning, so that is not an issue for me, but might be for people who aren't so into that.
4/11/10
English Muffins
4/9/10
Jelly Making Adventure

This week where I live, one of the grocery stores was having an awesome sale on strawberries - 3.99 for 4 pounds (that's a really great price here, I don't know about other parts of the country). I decided to use the opportunity to do something that I've been wanting to do for a while - make my own jelly!
I started with a pack of Sure-Jell (although I am questioning the truth of the name...more on that later). Basically the recipe was pretty simple -
4 cups of strawberries
3 cups of sugar
1 cup water
1 box Sure Jell (the less sugar kind)
Simple enough, right? Well, I must first say that I am not much one for following recipes. I see them as a guide, really. So any and all failure is fully my fault, and I accept that responsibility.
Back to the recipe - I cut up my strawberries and food processed them away until they were jelly-like mush. I went ahead and did the whole 4 quarts that I had (mistake). Then I combined the sugar and sure jell into a pot and mixed around. I added the water, and cooked it until it was fully boiling. At this point I have to tell you that I only used 1 1/2 cups of sugar. I read on a forum that I can't find now (sorry!) some people saying that they had cut down on the sugar with no problems, so I figured what the hey!? I might as well try. I typically try to make things as low-ish calories as I can, especially if you aren't even sacrificing taste. Well, I'm not sure if it was the lack of sugar or the altitude or a combination of both, but my jelly does not jiggle. It's more like sugary strawberry soup. The flavor is amazing, I must say, but I'm not sure exactly what I'm going to be able to use it for. I went ahead and put 3 of my 4 containers in the freezer, figuring that maybe a little chill would help it to solidify. I'm thinking it won't really matter, cause jelly gets pretty runny when you put it on something hot anyway, right?
All in all, I'd say the jelly making adventure was still a success. I cannot even describe to you how good the jelly tastes. So what if its not really jelly, per se. It still tastes good. And now I have about 3 cups of leftover strawberry mush that I didn't need for the jelly (see, I told you it was a mistake to puree them all at once!) so maybe I'll get another package of the pectin and try again....or maybe I will try and find something else yummy that requires ground up strawberries!
4/6/10
The beginnings of cake decorating

In light of the fact that Easter just passed, I thought I would share one of my favorite past times, cake decorating! Not only is it a wonderfully delicious hobby, but I actually really enjoy the creativity and thought process that is involved in making a cake that resembles something that people will recognize. This was my first ever decorated cake. It was for a FRG Easter party, and it was a hit! Actually, following this cake I took 3 of the Wilton cake decorating classes, but nothing I made was ever as popular as this one. Irony. This cake is really simple, albeit somewhat time consuming. Basically I started with two 9" circle cake pans and baked a boxed cake mix as directed (I did the high altitude directions, since we are at 6500 feet, and generally speaking the high altitude additions make the cake a lot more stable). Once the cake has baked and cooled, leave one circle intacts, and cut the other two into rounded ears. The two ears and bow tie will result from the one rounded cake. Below is a (very rough) diagram of how the second cake should be cut. The dotted lines represent where you should cut.

Once everything is cut, but place the pieces together like so, and you are ready to decorate. I chose to decorate with the star tip to make tiny stars all over the bunny, but of course, the creative inspiration is up to you. Have fun with it!
Subscribe to:
Posts (Atom)


